If any show had inspired me to get up and active, it was Rocket Power. Seeing the kids surf, and snowboard, and the million other things they did made me want to get into extreme sports too. Unfortunately, I’ve never been the athletic type (I trip over dust.), so that dream died pretty quickly. I still love the show though and I can pretend that I’m shredding along with them.
The kids really do have the life with where they live and the things they get to experience. They’ve got the sun. They’ve got the surf. They’ve got…SAND IN THE POTATO SALAD! Oh, what a tragic loss of potato salad! My heart really goes out to Sam. I can’t stand to see food go to waste, especially good food. I guess Sam can’t either, since he decides to eat the potato salad anyway, sand and all. I’d at least give it a shot, but sand just isn’t one of my favorite flavors. However, I’m liking the idea of adding some crunch to my potato salad. Oh, and I have no idea what’s in the potato salad besides potatoes and sand. Any potato salad can be used here, but I’m using some brain power and guessing that Tito, being the fabulous cook he is, probably whipped up a Hawaiian style potato salad for his Little Cuzes.
Recipe serves 6-8
Ingredients
1 ½ pounds (6-7) large red potatoes, peeled
1 ½ cups dry macaroni
3 eggs
1 tablespoon vinegar
2 tablespoons pickle relish
1 ½ teaspoons salt
½ teaspoon pepper
2 cups mayonnaise (More or less.)
¼ cup grated onion
½ cup grated carrots
1 cup frozen peas, defrosted
There aren’t orange or green bits in the potato salad, so the carrots and peas are optional.
1 ¼ cup bread crumbs
Directions
Place potatoes in a large pot and fill with water. Bring to a boil and cook until the potatoes are fork tender. Drain and set potatoes in an ice bath to fully cool. Drain again and cut the potatoes into chunks.
Bring a medium saucepan full of water to a boil. Add the macaroni and cook, stirring occasionally, until the noodles have cooked through, 8 minutes. Drain the noodles and rinse with cold water to cool.
Place eggs in a small saucepan and fill with water. Bring the water to a boil on high heat. Turn off the heat, cover, and let sit 12 minutes. Drain and rinse with cold water to cool. Peel the fully cooled eggs and separate the yolks from the whites. Cut the whites into small pieces.
In a medium bowl, mash the egg yolks. Then add the vinegar, pickle relish, salt, pepper, and mayonnaise. Stir to combine.
In a large bowl, combine the potatoes, macaroni, egg whites, onion, carrots, and peas. Add the dressing and stir to combine. You can eat it now, but potato salad really is much better after it sits. Cover and chill overnight.
Preheat oven to 350 degrees F.
Place bread crumbs on a rimmed baking sheet and bake until browned, 10 minutes. Cool completely. Process the crumbs until fine.
When ready to serve, top the potato salad with the toasted bread crumbs and enjoy!
This is definitely not the mustard-based potato salad I grew up on, but it’s oh so good. Hey, I just like potato salad. (Have you counted how many times I’ve mentioned potato salad in this post?) Every time I have the stuff, I just can’t help yelling, “They got sand in the potato salad!” I’m sure my family just loves that. But as goofy as sandy potato salad is, it’s an important part of the episode. Right here’s the turning point for the gang when they realize how wrong they were and clean up their act. That’s when enemies become friends and Sam finds that sandy potato salad really isn’t that bad.
Even though I love doing my Cartoon Cravings thing, I’m still not really a big fan of writing. I can talk someone’s head off about shows I love, but when I have to put it down on paper or a screen, it gets tough. So I do tend to procrastinate a bit and that always leads me back to SpongeBob SquarePants. A lot of things I do always seem to connect with SpongeBob. (I hope it’s not just me.) I think that’s part of SpongeBob’s charm. Some things are so unexpected and other things hit so close to home that you can’t help but laugh at it. Yeah, a sponge living in a pineapple and working as a fry cook sounds pretty weird. But the world loves weird, because it seems like every person out there has at least heard of SpongeBob.
Now here’s my chance to tackle a show I’ve loved for years and has involved food since Episode One. Every time I turn around, the characters are at the Krusty Krab and Krabby Patties are showing up everywhere. And what do I do? I make pizza. I know. I couldn’t help myself. “Pizza Delivery” is in my Top 2 of Spongebob episodes. (“Band Geeks” takes the top spot by a slim margin.) And it really is the perfect way to describe my life. Oh, and I can’t forget the “Krusty Krab Pizza” song! Every time we have pizza in this house, someone is singing that song. By someone I mean me. And my sister. She takes care of the high notes for me. I’ll get to a good ol’ Krabby Patty sometime down the line, but at least it’s a Krabby Patty Pizza. Mr. Krabs mashes up Krabby Patties, so I figured it had to be a cheeseburger pizza. It’s just topped with mushrooms and pepperoni for an extra oomph.
Recipe makes 1 really large pizza or two 12-inch pizzas.
Ingredients
Crust:
1 ¼ cups warm water (105-115 degrees F)
2 ¼ teaspoons yeast
3 teaspoons sugar
3 tablespoons instant non-fat dry milk powder
1 ½ teaspoons salt
1 ½ tablespoons olive oil
3 cups bread flour
Sauce:
¼ cup, plus 2 tablespoons ketchup
1 ½ tablespoons mustard
1 ½ tablespoons mayonnaise
1 teaspoon sugar
Toppings:
Ground Beef:
½ pound ground beef
½ cup chopped onions
1 teaspoon Worcestershire sauce
3 teaspoons of your favorite hamburger rub or spice combination
Up to 1 tablespoon of liquid smoke (Optional)
1 tablespoon olive oil
Use as much or as little of:
Shredded Mozzarella
Shredded Cheddar Cheese (Or use your favorite cheese combination.)
Dill Pickles
Mushrooms
Pepperoni
Directions
Crust:
In a small bowl, dissolve yeast and sugar in the warm water. Let rest for 5 minutes or until foamy. Combine flour, dry milk powder, and salt in a large bowl. Add olive oil and yeast mixture to flour. Stir to combine and form into a ball with your hands. Turn the dough out onto a lightly floured surface and knead for 10 minutes. Form the dough into a ball again and place in a large bowl. Lightly coat dough with oil and cover bowl with plastic wrap. Let the dough rise in a warm place for 2 hours or until it has doubled in size. Punch down the dough and flatten and stretch it into desired pizza size and shape. Let rest for 15 minutes on a lightly floured pizza paddle or on your pizza pan.
Sauce:
Combine ketchup, mustard, mayonnaise, and sugar in a small bowl.
Ground Beef:
Heat the olive oil in a large skillet over medium-high heat. Add the onions, ground beef, hamburger rub, Worcestershire sauce, and liquid smoke. Cook until the meat has browned. Remove from heat and set aside.
Putting It All Together:
If you have a pizza stone, place it in the oven. If not, just make your pizza on the pan and place it in the oven once it is heated.
Preheat oven as high as it can go! Mine was at 550 degrees F.
Ladle desired amount of sauce onto crust. Layer dill pickles over the sauce. Spread the ground beef over the pickles. Add cheese. Top with mushrooms and pepperoni. Transfer the pizza from paddle to stone or place your pizza pan in the oven. Bake until crust is browned and cooked through. My pizza was in there for 15 minutes, but all ovens vary so you may have to adjust your cooking time.
Remove the pizza from oven. Slice and enjoy!
I’d be happy to eat the whole thing in one bite. I don’t need a Diet Dr. Kelp. Seriously, I will never forgive that guy for making SpongeBob cry. If I didn’t already like Squidward, his heroics right there would easily have won me over. The honor of having the first Krabby Patty Pizza is wasted on a jerk. And how come that pizza didn’t take off? It’s awesome! Maybe Mr. Krabs didn’t find it cost-effective. After all, he did ADD the mushrooms and pepperoni.
There are a lot of super geniuses out there in cartoon land. Although I do love them, I feel more at home with the less intelligent and the stupid folk. (I can’t imagine why.) I tried the science thing for a while and turns out, it wasn’t for me. It would be nice to have the brain power to invent gadgets and elixirs for the betterment of mankind. (Or at least myself.) Yeah, I’d probably make most of my stuff for the wrong reasons and end up doing more harm than good. Kind of like the disastrous combination of the Test kids. Just like Johnny, I’d run to the Lab whenever I have a problem, use something that I’m probably not supposed to, and destroy half of my city. I know it’s wrong, but it really does sound kind of fun. And Johnny’s daily life frequently includes a bunch of villains bent on his destruction who are a lot more misguided than evil. And they love a good competition. See, even more fun.
What’s not so fun about living in the Test house is dinner. Or should I just call it meatloaf because they don’t eat much else. Now I love a good meatloaf, (And I think deep down so do the Tests.) but eating one night after night after night gets pretty old pretty fast. That’s even if it’s edible. More often than not it’s too dry or disgusting. Just the word “meatloaf” strikes fear into any member of the Test Household, minus Dukey and Hugh, the meatloaf fanatic. Hugh spends most of his days at home, so he’s got plenty of time to perfect his meatloaf recipes. Instead of focusing on making one killer meatloaf, (I mean that in terms of taste, not the meatloaf monster.) he makes all sorts of meatloaf creations. He’s tried flavored meatloaves, meatloaf casserole, meatloaf pie, meatloaf balls, meatloaf parfaits, mini meatloaves, and meatloaf burritos. Wow, that is a lot of meatloaf. I see how it can get scary in the wrong hands. But I don’t eat meatloaf all that often, so all the possibilities are beginning to sound exciting. Plus, I really like saying “meatloaf burritos.”
Recipe makes six burritos.
Ingredients
Meatloaf:
1 pound ground beef or a mixture of beef and pork (I like using a ½ pound of each.)
1 tablespoon vegetable oil
1/2 cup onion
1/4 cup red bell pepper
1/4 cup orange bell pepper
1 teaspoon minced garlic
1 egg
1/3 cup bread crumbs
1/4 cup milk or heavy cream
1/2 tablespoon ketchup
1/2 teaspoon Worcestershire sauce
3/4 teaspoon salt
1/4 teaspoon pepper
1/2 teaspoon cumin
1/2 teaspoon chili powder
1/2 teaspoon parsley
Glaze:
3 1/2 tablespoons ketchup
1 1/2 tablespoons mustard
3 tablespoons brown sugar
1 tablespoon vegetable oil
6 (8-inch) flour tortillas
Burrito Fixings- Cheese, Refried Beans, Etc. (Optional) I tried plain, with cheese, and bean and cheese, and they were all yummy.
Directions
Meatloaf:
Heat 1 tablespoon of vegetable oil in a small skillet over medium heat. Add onions and peppers and cook until soft and onions are translucent. Add garlic and cook for 30 seconds. Remove from heat and set aside to cool.
Preheat oven to 350 degrees F.
In a large mixing bowl, combine the egg, bread crumbs, milk, ketchup, Worcestershire sauce, salt, pepper, cumin, chili powder, and parsley. Add the vegetables and meat and mix until combined.
Transfer the meat mixture to a parchment-lined pan. I chose a 10 X 10. Shape the mixture into a loaf and bake for 20 minutes.
Make the glaze by combining ketchup, mustard, and brown sugar in a small bowl. Brush the meatloaf with the glaze and bake another 25 minutes or until the meatloaf’s internal temperature reads 155-160 degrees F. Remove the meatloaf from the oven and allow to cool for 10 minutes.
Putting It All Together:
Cut the meatloaf into 6 slices. Break up a slice and spread over a tortilla, along with anything else you want to add. Fold the sides and roll up the tortilla. Repeat with the rest of the meatloaf slices.
Heat vegetable oil in a large skillet over medium-high heat. Lightly brown the burritos on all sides and serve!
Johnny’s dad was really on to something with the whole meatloaf burrito idea. And mine don’t stink at all! Even my anti-meatloaf sister enjoyed her’s. Too bad, because then there’d be more for me. Now just because I made a yummy meatloaf, doesn’t mean I’m going to eat one every day. That’s where poor Hugh messes up. As for myself, I think I’ll have spaghetti for dinner.
Episode: Johnny Bravo Deep Fried Peanut Butter and Banana Sandwich
More often than I’d like to admit, I’ve released my inner Johnny Bravo on the unsuspecting world. I’ll say or do something Johnny-ish and my sister will immediately turn to me and say, “No more Johnny Bravo for you.” I can’t help it. It left quite the impression on me since I saw it on What A Cartoon! I felt like all of those shorts that went on to become Cartoon Cartoons were made just for me. (Forget all the popularity and demographic mumbo jumbo. They were made for ME and only ME.) There were so many things that went right over my head, but I didn’t care. That’s why now I appreciate quality shows with multiple levels. I hardly got any of Johnny Bravo‘s pop culture references, but I still enjoyed them. I wouldn’t love Donny Osmond as much as I do if I hadn’t seen him on the show. Sad but true.
And how can I not want to be Johnny Bravo? (Or Jenny Brava in my case.) In his own way, Johnny is kind of a good role model. Not the vain, meat-headed, pig side of him. That’s bad. (There’s something up with those sunglasses.) What I’m talking about is Johnny’s self-confidence. I want to get up every morning, look in the mirror, and have to call emergency personnel because I look that good. And he can deliver the goofiest pickup lines with ease because he truly believes in himself. Then when he’s crushed (literally) his confidence only wavers for a moment, if at all. He’s good. I mean, he’s the kind of guy that can break into song, pull a pot of hot oil out of nowhere, make a peanut butter and banana sandwich, and deep fry that bad boy in seconds. Sure, that’s probably because he’s a cartoon character, but I’d like to believe that that’s just one of Johnny’s superpowers. I can make a deep fried peanut butter and banana sandwich too, but it’s going to take me a couple minutes. And I can’t fry a thing with that kind of finesse. I better get practicing.
So, Johnny just plops a sandwich into the hot oil. That’s fine and dandy, but if I do that, all I end up with is soggy bread without a trace of peanut butter left inside. To protect the sandwich, it’s getting a nice coating of batter first.
Recipe makes 2 sandwiches.
Ingredients
Sandwiches:
4 slices of bread
4 tablespoons peanut butter (You can add more if you want but beware of leakage.)
1-2 large bananas (Depends on how much banana you like.)
Vegetable Oil for Frying
Batter:
½ cup milk
1 egg, beaten
¼ teaspoon vanilla extract
½ cup flour
1 teaspoon sugar
½ teaspoon baking powder
¼ teaspoon baking soda
¼ teaspoon salt
Directions
Sandwich:
I know everyone has their own way of making sandwiches, so do what you need to make peanut butter and banana sandwiches. You can spread 1 tablespoon of peanut butter onto each slice of bread. Slice the banana in half, lengthwise, or into about ¼ inch slices. Lay either both banana halves or about half of the slices on one piece of bread. Top that with the second slice of bread.
Batter:
In a small bowl, combine the milk, egg, and vanilla extract. In a large bowl, whisk together the flour, sugar, baking powder, baking soda, and salt. Add the wet ingredients and whisk until a smooth batter of dippable consistency forms. If you want it thinner, add more milk.
Putting It All Together:
Heat oil in a large pot/deep skillet or in a deep fryer to 350 degrees F.
Dip the sandwich into the batter and coat thoroughly. Allow the excess batter to drip off and use tongs to move it to the hot oil.
Fry the sandwich until golden brown on each side, 2-2 ½ minutes. Drain the sandwich on paper towels and repeat with the second sandwich. Serve warm!
I understand that the zookeeper had a lot on her mind since a 900-pound gorilla escaped, but if I’m offered a deep fried peanut butter and banana sandwich, I’ll happily take it. Well, you probably shouldn’t take food from strangers, but I’d take one from Johnny. He was only trying to impress a pretty girl, but he went searching for the gorilla even though he had no idea what one looks like. His heart’s in the right place. It’s the Bravo brain that needs help.
I’ve been wondering for a long time just how well I’d fare in a reality competition series. I know I wouldn’t make it anywhere near the end, but maybe, just maybe, I might make it past the first elimination. I’m not all that eager to find out though, because my couch is a far safer place than any of these shows. How well do you think anyone would do on Total Drama Island? Me personally, I’m one of those non-athletic people with a low tolerance to pain who hate gross foods and situations. Chris McLean would eat me alive. Obviously, I mean that figuratively since he and Chef eat fancy food at Craft Services every day. The campers, I’m not so sure. Anything is better than the… “food” that Chef serves. I don’t doubt he’s skilled. I’m just not into things like French Bunion Soup with hangnail crackers. I can see why everyone started puking at the Brunch of Disgustingness.
Actual non-disgusting foods do show up every once in a blue moon. The most memorable for me would be the all-you-can-eat pancake breakfast Chef serves the campers. Maybe it’s because Chris had to specify that Chef was preparing genuine food by-products served with fresh ingredients relatively close to their expiration dates. (Yum!) Or maybe it’s because of Owen and his pancake song. Yep, definitely Owen. (“Pancakes! Pancakes! Pancakes!”) He was more excited about pancakes than getting closer to winning the $100,000. I would still want the money, but I do kind of agree with Owen. The only thing better than pancakes is all-you-can-eat pancakes!
Recipe makes 8 six-inch pancakes.
Ingredients
2 cups flour
3 tablespoons sugar
2 teaspoons baking powder
1 teaspoon baking soda
½ teaspoon salt
2 large eggs, room temperature, slightly beaten
2-2 1/2 cups buttermilk, room temperature
¼ cup (1/2 stick) butter, melted and cooled slightly
1 teaspoon vanilla
Toppings like almond slivers, maple syrup, and candy (Optional)
Directions
Preheat the oven to 200 degrees F.
Heat an electric griddle to 375 degrees F or set a skillet over medium heat.
In a large mixing bowl, whisk together flour, sugar, baking powder, baking soda, and salt. In another bowl, whisk together eggs, buttermilk, butter, and vanilla extract. Add the wet ingredients to the flour mixture and whisk to combine. Don’t overmix. The batter should still have lumps. Grease griddle with butter, vegetable oil, or non-stick cooking spray. Ladle out about ½ cup of batter onto the griddle. You may have to use the ladle to shape the pancake into a large disk. Cook until the pancake bubbles and the edges begin to set, 2 ½-3 minutes. Flip the pancake and cook until golden on the bottom, about 2 minutes. Place pancake in the oven to keep warm. Repeat the process until you run out of batter. Tee ‘em up!
You don’t need to win 100 Grand to start every day with pancakes. They don’t cost all that much to make and it’s way easier than playing on Total Drama Island. Pancakes are like little mini sunshines filled with yummy fun. Camp Wawanakwa is not. Owen, with his deep pancake wisdom said, “All the all-you-can-eat pancakes in the world wouldn’t be special without friends to share them.” (Then he went on to eat a toilet seat.) That may be true, but all of the all-you-can-eat pancakes in the world wouldn’t be enough to get me on that show.
Avatar: The Last Airbender came into my life at the most opportune moment. My TV watching days and school life were both changing so drastically, that it was getting harder to find things to watch and even harder to find the time to watch them. I was busier than ever and didn’t have too much to look forward to except doing piles of homework. Then came Avatar. It’s so beautiful and different that I immediately fell in love with it. To me, it was so much more than just a cartoon and I was on pins and needles waiting for each new episode.
There are so many strange and wonderful places, people, and animals in the Avatar universe. And let’s not forget food! Out of all the tasty treats, the one that caught my attention as much as Aang’s is an egg custard tart. He was all goo-goo eyes for it because he hadn’t eaten since before he stepped into the Great Divide. Plus, I hear he has quite the weakness for these tarts. So do I.
Recipe makes one deep 8-inch tart or about two regular 9-inch tarts.
Ingredients
Crust:
1 ¾ cups cake flour
1 cup powdered sugar
1/8 teaspoon salt
½ cup (1 stick) butter, cold and cut into chunks
1 large egg
Filling:
2 cups water
1 cup sugar
6 large eggs, room temperature, beaten
1 cup half-&-half, room temperature
2 teaspoons vanilla
Directions
Crust:
In a food processor, pulse cake flour, powdered sugar, and salt until combined. Add butter and pulse until mixture resembles coarse crumbs. Add the egg and pulse until dough just comes together when pressed. If the dough is too dry, add ice water, 1 teaspoon at a time, and pulse again. Form dough into a disk and cover in plastic wrap. Let dough chill until firm, 30 minutes to an hour.
Filling:
Combine water and sugar in a small saucepan and heat until the sugar completely dissolves. Let sugar water cool to room temperature. In a large mixing bowl, whisk together eggs, half-&-half, sugar water, and vanilla. Strain mixture through a fine mesh strainer.
Putting It All Together:
Unwrap dough and place on a lightly floured surface. Roll out dough anywhere from 10 to 14 inches across and place in a 1.5 quart, round casserole dish. Gently press dough into place. Trim excess dough or fold it back on itself. Chill for 30 minutes.
Preheat oven to 450 degrees F.
Pour filling into crust. I sent it through the strainer once more to ensure no chunks or bubbles appeared on the surface of the tart. Bake for 15 minutes. Reduce heat to 350 degrees F and bake for 1-1 ½ hours, or until skewer inserted in it comes out clean. If the edges of the crust darken too quickly, cover them with foil. Remove tart from oven and cool on a wire rack for 2 hours. Remove from dish and serve or just dig in!
So I had a little mishap when I went to remove my tart from its dish, so it’s not as pretty as it was when it came out of the oven. But someone in the Zhang tribe managed to carry an egg custard tart for an entire day throughout the largest canyon in the world and it stayed perfect. Tarts don’t really travel well, so I’d say in all actuality, my tart doesn’t look too far off from what it should be.
It’s funny, but I feel a bit like the Avatar when I’m in my kitchen. I have to master all four elements (I still need some work on my airbending.) to bring together ingredients from different backgrounds to create something grand. Although I’m not ready to take on the world just yet, I believe I can bring peace to my pantry.
The city of Townsville. It’s a nice, bustling metropolis which would be a great place to live if it wasn’t being attacked every day. Whether it’s monsters, aliens, or supervillains, the city’s got them. Or I should say they’ve got the city. I would’ve moved out a long time ago. Well, if I lived in the Powerpuff universe, I’d like to be a fourth Powerpuff Girl. Not like Princess or Bunny but a nice mix of Blossom and Bubbles. (I think I’m just a little too soft to be Buttercup.) I could be a good addition to the team who saves the world before bedtime. I’ve got the brains to outwit Mojo Jojo, the courage to scare away The Boogie Man, and the guts to take out The Broccoloids.
Speaking of guts, just like half the people out there, I’m trying to eat a little healthier and get back into shape. (Emphasis on trying because I’ve eaten pizza more than once this week.) I’ve never had a problem with eating my veggies like the kids in Townsville do. My problem is stuff like liver and onions. So what better health food to whip up than broccoli? Just like Professor Utonium says, “It’s exactly what growing superheroes need to charge up their powers.” I don’t know how the people of Townsville prefer their broccoli cooked, but I’m roasting mine. And just to add a little more pizzazz, I’m serving it over a rice pilaf.
Recipe makes 5-6 servings.
Ingredients
Broccoli
1 large head of broccoli, cut into florets and chunks
2 tablespoons olive oil
2 cloves garlic, minced
Salt
Pepper
Rice Pilaf
2 cups white rice, rinsed
2 ½ cups chicken broth
¼ cup water
2 tablespoons butter
½ medium onion, minced
1 clove garlic, minced
1 bay leaf
1 teaspoon salt
Directions
Preheat the oven to 425 degrees F.
Broccoli:
Combine broccoli, olive oil, garlic, salt, and pepper in a large mixing bowl. Spread out onto a baking sheet. Move the baking sheet to the oven and roast the broccoli until it’s tender, about 10 minutes. Remove from oven.
Rice Pilaf:
Preheat the oven to 350 degrees F.
Melt the butter in a large, ovenproof saucepan over medium heat. Add onions and cook until translucent, 3-4 minutes. Add garlic and cook for 30 seconds. Add rice and cook, stirring frequently, until the rice becomes fragrant, 3-4 minutes. Add the chicken broth, water, bay leaf, and salt. Bring the mixture to a boil.
Remove saucepan from heat, cover with lid or foil, and transfer to oven. Bake for 15 minutes. Remove from oven and let it rest for 15 minutes without removing the lid or foil. Remove the bay leaf and fluff the rice with a fork.
Putting It All Together:
Scoop and spread out rice onto a plate. Top with a hearty amount of broccoli. Time to eat it all up!
I can pop broccoli into my mouth like it’s vitamin and mineral packed candy, so the Broccoloid Empire better be wary. And if I’m armed with cheese sauce…let’s just say it’s not going to be a pretty sight. Just like when the day comes where I snap and start eating the produce section at my local grocery store. I know that broccoli doesn’t have the same appeal as cake, a corndog, or a hamster (No, I don’t eat hamsters.), but it does taste good and it’s good for you too. Both in the bodily health sense and the prevention of destruction by evil broccoli-based aliens sense. So when you do get served some veggies, you better eat all of them because you can never be too careful.
Who wouldn’t want the Grim Reaper to be his/her best friend forever? You get to pal around with the master of the forces of life and death. And in Billy and Mandy’s case, you get to boss him around. Talk about power. You also get to encounter all sorts of monsters and magic that most people don’t even know exist. I can see how that can lead to trouble pretty quickly. Just look at Billy and the whole Chocolate Sailor debacle. He becomes so addicted to the chocolate he’s supposed to be selling that he becomes solid chocolate and eats himself.
It’s sad to say, but that would probably happen to me too because I like chocolate! I’ve just about taken out my dad over the stuff. Just like Billy. I’m not proud of it, but I just can’t stop. If the Chocolate Sailor offered me an assortment of enchanted chocolates, I’d have to try them all. So just in time for Halloween, here’s an assortment that you can eat all of without exploding into a big, chocolatey mess.
Ingredients
1 pound milk chocolate, coarsely chopped or melting wafers
1 pound dark chocolate, coarsely chopped or melting wafers
2 pounds white chocolate, coarsely chopped or melting wafers
Light green food coloring
Caramel
1 cup sugar
¼ cup light corn syrup
¼ cup water
½ cup heavy cream, room temperature
4 tablespoons butter, room temperature- cut into chunks
½ teaspoon salt
Buttercream
¼ cup (half stick) butter, room temperature
¼ cup shortening
1 teaspoon vanilla extract
2 cups (half pound) powdered sugar, sifted
Chocolate Hazelnut Spread
1 cup hazelnuts, skinned
3 tablespoons sugar
12 ounces semisweet chocolate, chopped
2 tablespoons vegetable oil
1 tablespoon unsweetened cocoa powder
½ teaspoon vanilla extract
3/4 teaspoon salt
Marshmallows
1 ½ packets of unflavored gelatin
½ cup cold water, divided
½ cup light corn syrup
¾ cup sugar
1/8 teaspoon salt
1 teaspoon vanilla extract
¼ cup powdered sugar, sifted, plus more if needed
Peanut Butter Filling
1 ½ cups peanut butter
3 tablespoons butter
2 cups powdered sugar, sifted
Or 1 package caramels
1 container buttercream
1 jar chocolate hazelnut spread
1 package marshmallows
Directions
Caramel:
Grease and line an 8 inch baking dish with parchment paper.
In a saucepan, combine sugar, corn syrup, and water. Place over high heat and stir until sugar has dissolved. Attach a candy thermometer to the side of the pan and cook until the mixture reaches 230 degrees F. Reduce heat to medium and cook, without stirring, until the syrup mixture is golden. When the syrup reaches close to 300 degrees F, gently stir. Continue to cook until the syrup turns dark amber and closes in on 350 degrees F. Remove from the heat, stir, and let sit for a couple minutes. Slowly add heavy cream, butter, and salt. The mixture will bubble, so be careful. Return the saucepan to the stove and stir until the butter is completely melted. Cook over medium heat until it reaches 255 degrees F. Take off the heat and pour into a prepared pan. Tap the pan to remove bubbles and place on a cooling rack. Let sit for about 4 hours and cut into pieces. (If you plan on making your chocolates right away, you can just leave your caramel in the saucepan and just allow it to cool slightly.)
Buttercream:
In a stand mixer, beat butter and shortening until fluffy. Add vanilla extract. Beat powdered sugar in, a little at a time. Scrape down sides of the bowl and add milk. If the icing is too thick, add more milk, ½ teaspoon at a time.
Chocolate Hazelnut Spread:
Preheat oven to 350 degrees F.
Place hazelnuts on a baking sheet and toast for 15 minutes, or until deep brown. Let cool.
Grind hazelnuts and sugar in a food processor for about 1 minute, or until smooth. Melt chocolate in a bowl over a saucepan of simmering water and let cool. Add vegetable oil, cocoa powder, vanilla extract, and salt to hazelnut paste and process until smooth. Add the melted chocolate and combine. Strain if there are excess hazelnut chunks. Let cool completely to thicken.
Marshmallows:
Lightly grease an 8 X 8 baking dish with nonstick cooking spray. Dump powdered sugar into the dish and swirl it around until the bottom and sides are completely coated. Shake excess powdered sugar into a bowl for later use.
Pour gelatin and 1/4 cup of cold water in the bowl of a stand mixer equipped with the whisk attachment. While the gelatin is blooming, combine the remaining 1/4 cup of water, corn syrup, sugar, and salt in a small saucepan. Place the saucepan over medium high heat and cook until the sugar has dissolved. Attach a candy thermometer to the pan and continue to cook, without stirring, until it reads 240 degrees F. Immediately take the syrup off the heat. With the mixer on low, pour the syrup into the gelatin. When all of the syrup is in the bowl, increase the mixer’s speed to high. Whip the mixture until it’s thick, about 12 minutes. Add the vanilla extract during the last minute of whipping.
Pour the marshmallow into the prepared pan and spread evenly with a lightly greased spatula. Things may get messy! Sprinkle some of the remaining powdered sugar over the marshmallow to completely cover the top. Let the marshmallow completely rest until firm, about 4 hours. (If you plan on making your chocolates right away, you can spread the marshmallow into your molds before it fully sets.)
Turn out marshmallow onto a cutting board. With a lightly greased knife or pizza cutter, cut into marshmallows. I usually aim for 2-inch squares. Roll the marshmallows into the rest of the powdered sugar to coat all sides.
Peanut Butter Filling
Add peanut butter, butter, and powdered sugar in a stand mixer and beat on medium-low speed until combined.
Putting It All Together:
Caustic Caramel Cream:
Melt half of the white chocolate in a double boiler or a bowl over a pot of simmering water. Stir in a small amount of light green food coloring. Spoon a small amount of chocolate into the chocolate molds of your choice and swirl around. Use a small paintbrush or similar tool to ensure that chocolate covers the entire mold. Dump excess chocolate back into the bowl. Let the chocolate set.
Melt caramel and 2 tablespoons milk in a saucepan. Spread caramel and then buttercream in the mold, leaving enough room to encase it in chocolate. Pour more colored white chocolate on top to seal in caramel and buttercream. Tap mold on the counter to remove bubbles. Let chocolate completely set. Remove from mold.
Horrific Hazelnut:
Melt milk chocolate in a double boiler or a bowl over a pot of simmering water. Spoon a small amount of chocolate into the chocolate molds of your choice and swirl around. Use a small paintbrush or similar tool to ensure that chocolate covers the entire mold. Dump excess chocolate back into the bowl. Let the chocolate set. Spread chocolate hazelnut spread in the mold, leaving enough room to encase it in chocolate. Pour more chocolate on top to seal in spread. Tap mold on the counter to remove bubbles. Let chocolate completely set. Remove from mold.
Mutating Marshmallow:
Melt dark chocolate in a double boiler or a bowl over a pot of simmering water. Spoon a small amount of chocolate into the chocolate molds of your choice and swirl around. Use a small paintbrush or similar tool to ensure that chocolate covers the entire mold. Dump excess chocolate back into the bowl. Let the chocolate set.
Melt marshmallows either in a small saucepan or in the microwave. Spread marshmallow in the mold, leaving enough room to encase it in chocolate. Pour more chocolate on top to seal in marshmallow. Tap mold on the counter to remove bubbles. Let chocolate completely set. Remove from mold.
Antidote:
Melt the other half of the white chocolate in a double boiler or a bowl over a pot of simmering water. Spoon a small amount of white chocolate into the chocolate molds of your choice and swirl around. Use a small paintbrush or similar tool to ensure that chocolate covers the entire mold. Dump excess chocolate back into the bowl. Let the chocolate set. Spread peanut butter filling in the mold, leaving enough room to encase it in chocolate. Pour more white chocolate on top to seal in filling. Tap mold on the counter to remove bubbles. Let chocolate completely set. Remove from mold.
Variations:
Whenever I make candy, I try to make it worth my while. I just whip up a bunch of stuff and make candy until I run out of ingredients. You can easily make more or less of anything by halving or doubling any of the recipe.
Antidote doesn’t have a specific flavor, so I made what I wanted. I wanted peanut butter, but you can fill it with whatever you want or not fill it at all.
Although I have a ton of candy molds, nothing comes close to the big-mouthed monster looking things in the enchanted chocolate assortment. I used skeletons because they were on hand, but you can use whatever molds you want. If you don’t want to make them in molds, you can put the candy together in a parchment lined pan and cut them into bars.
Now we’ve got an army of enchanted chocolates minus the enchantment part. As hard as I tried, I still ended up a big chocolatey mess. At least I’m still human. I think. So maybe I haven’t learned my lesson yet. Enough chocolate induced stomach aches and I’ll change my ways. Either that or someone gets me an issue of Man Eating Comics.
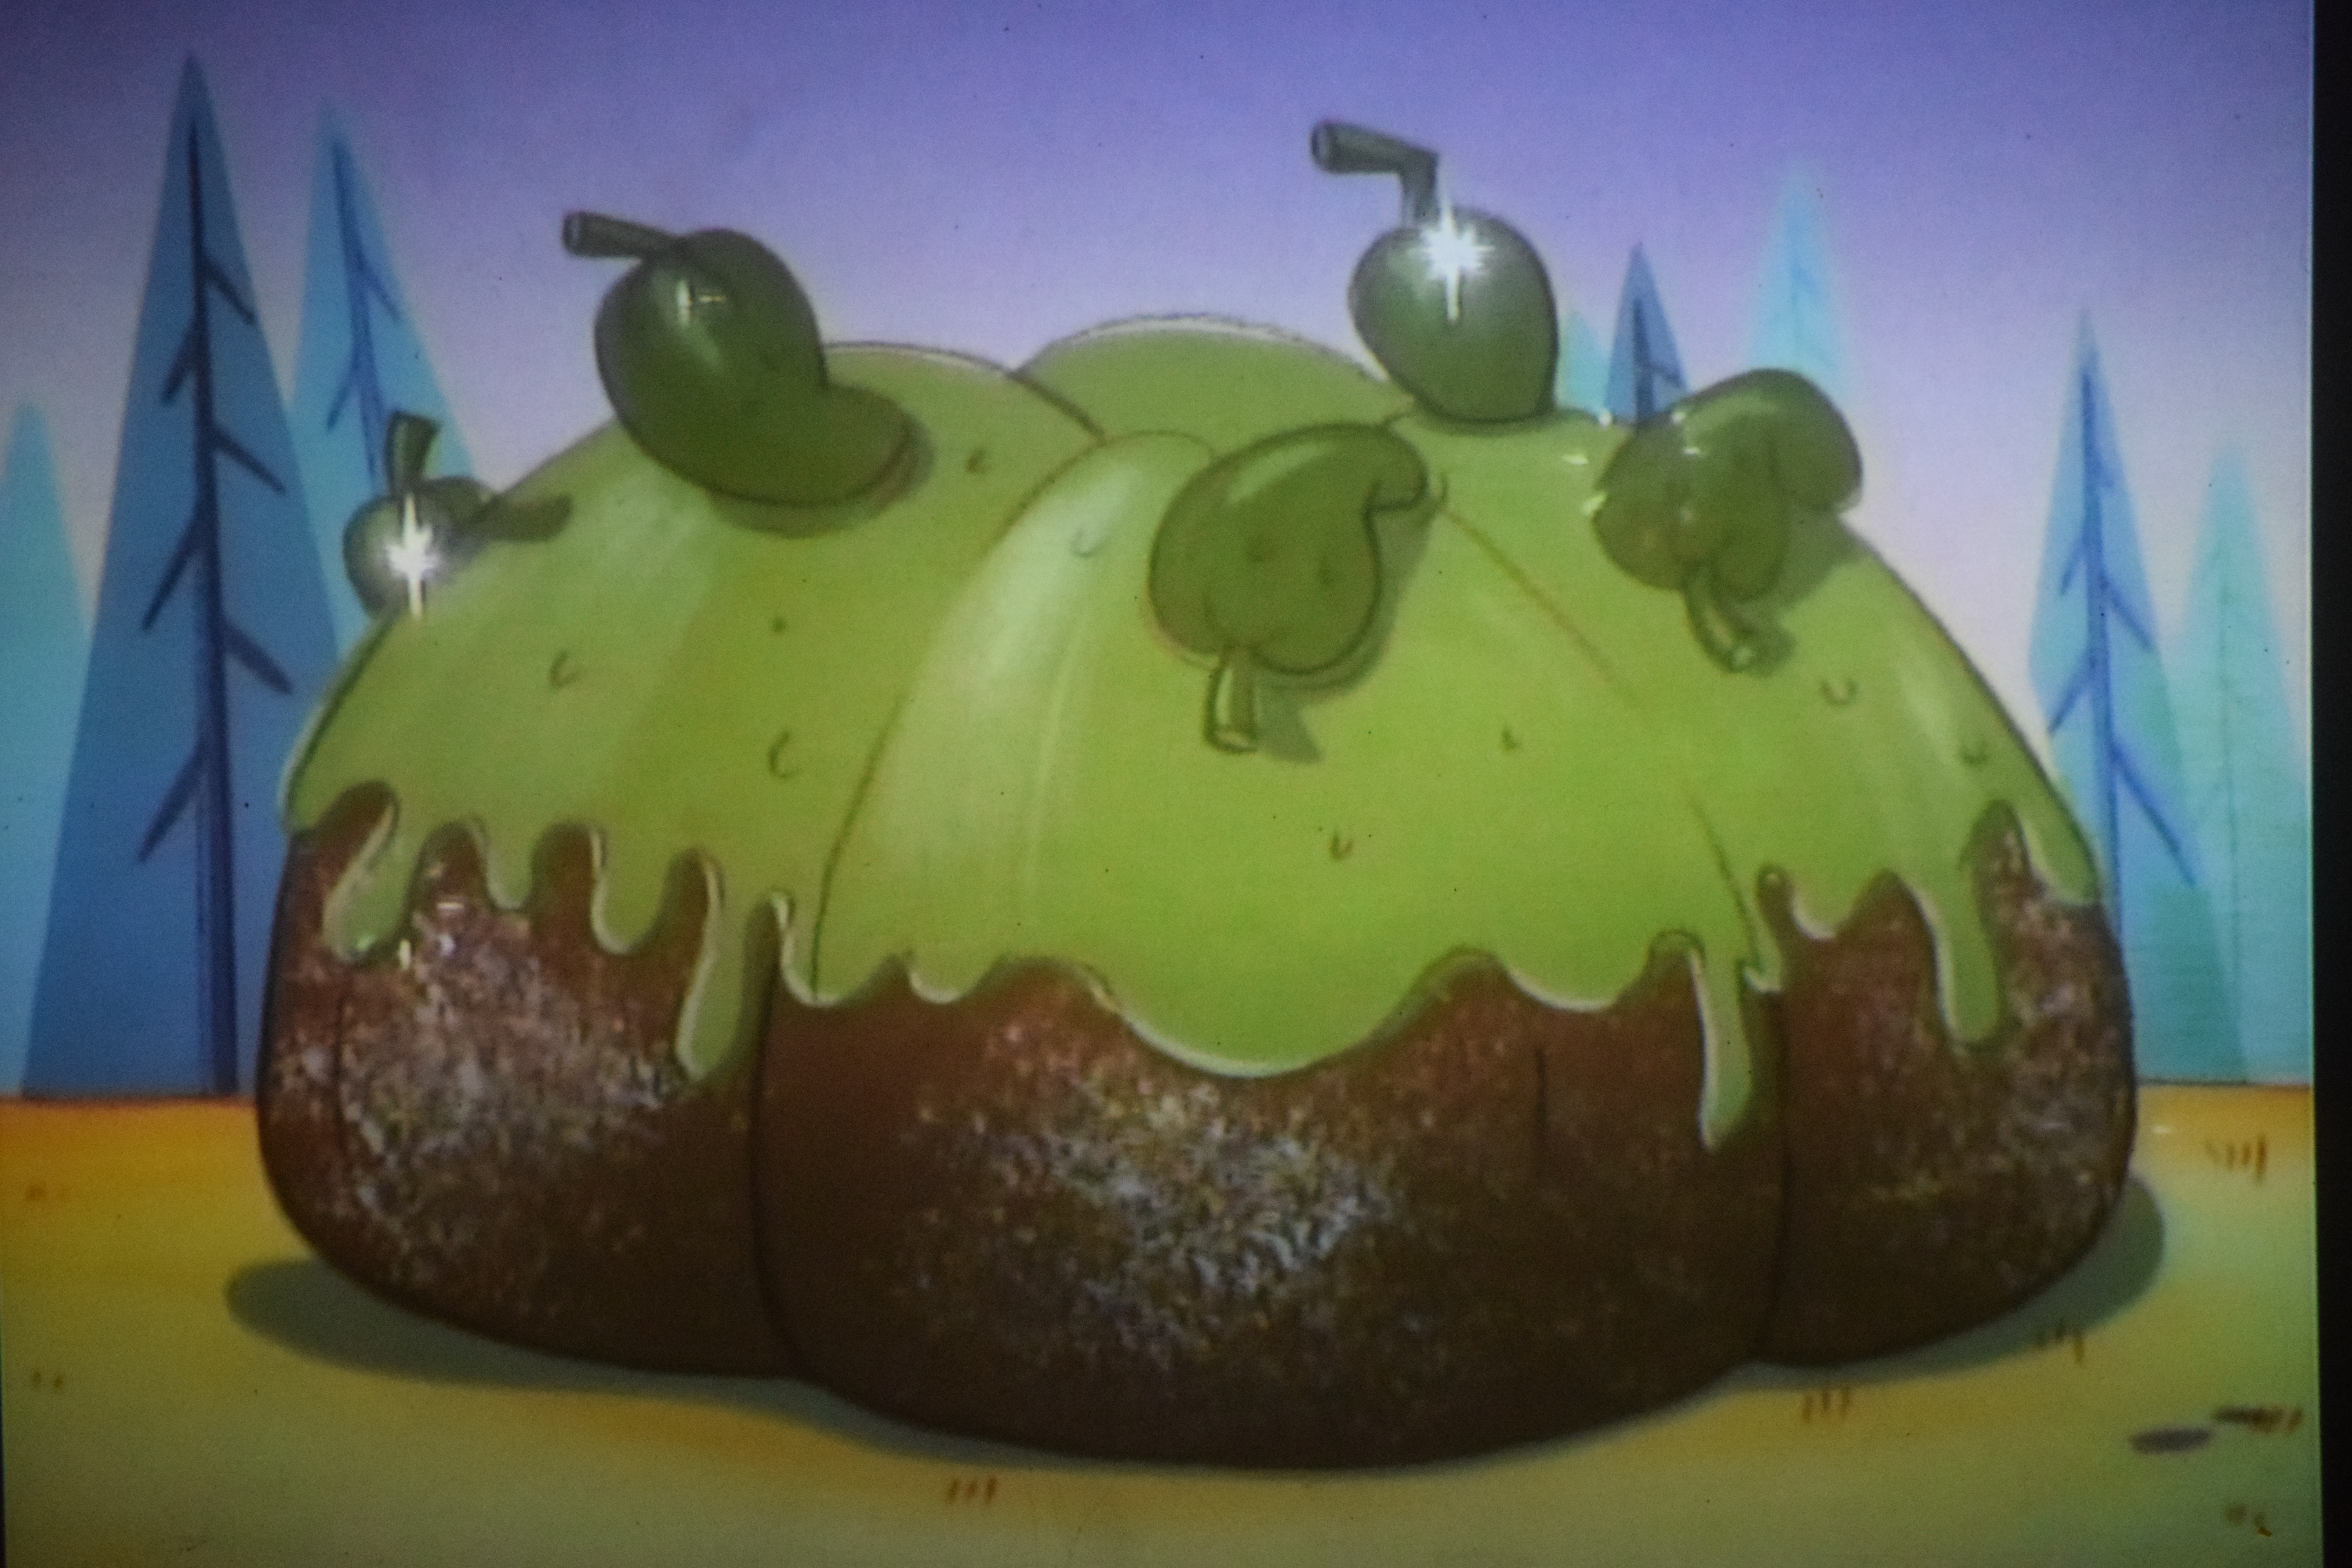
I’m going to go out on a limb here and say that angry beavers are probably my spirit animals. (Get it? Limb. You know, trees?) Sorry about that. Anyhoo, those pointy weasel things do indeed lead a life not too different from mine. Norbert and Daggett are supposed to be responsible and basically adult-like, but they spend most of their time playing with toys, eating junk food, and staying up all night watching TV. Yep, same here. We can’t help it. We’re all just big kids. Oh, and in case you’re curious, I’m the Daggett Doofus Beaver of my house. I’m a big, klutzy, daddy longlegs hating baby who breaks things. My Norby Worby just so happens to be my little sister. She acts much older than I do and she’s crazy about hair and music. Also, she may have on occasion tricked me into doing things for her. All we need is a bunk bed and some Lickety-Splits and we’re the beaver dream team.
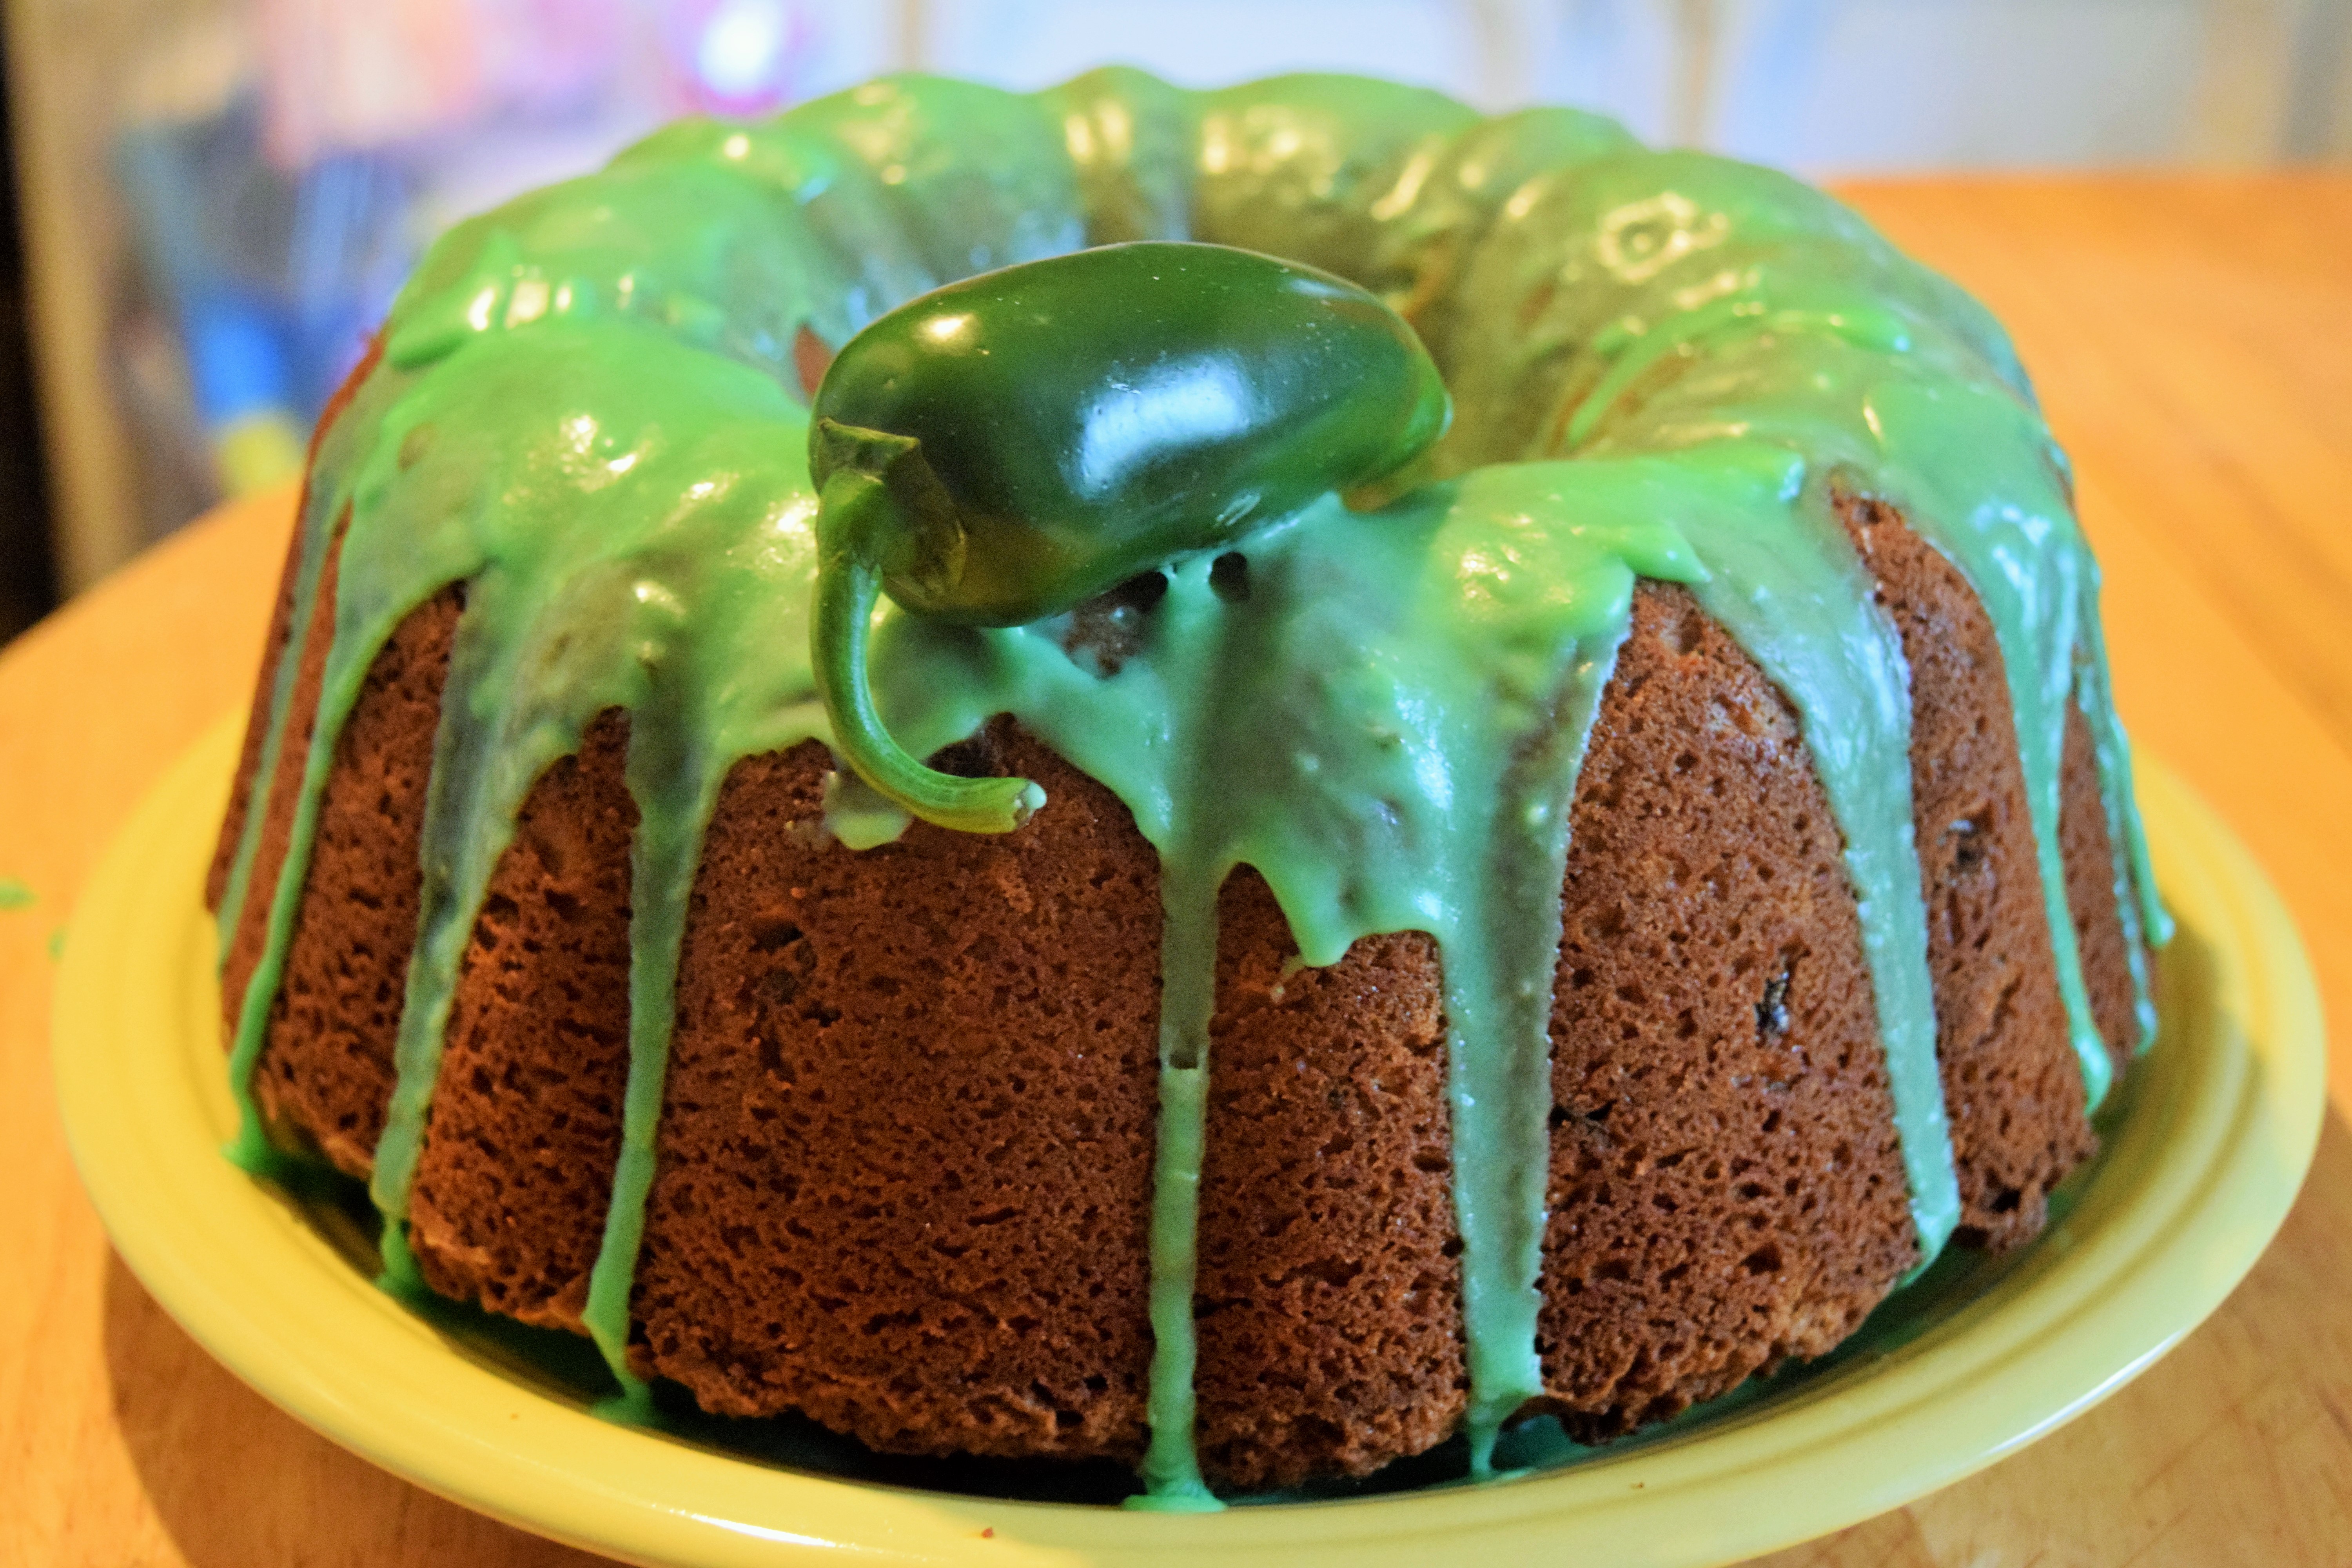
There’s just one thing we’re missing: jalapeños. The beavers’ food of choice. And what is the best way to wolf down those little peppers? By baking a jalapeño Bundt cake! With all the junk those boys scarf down, this cake has got to be the granddaddy of it all if Dag says it’s his favorite.
Ingredients
Cake:
1 cup (4 large) jalapeños, plus any extras for garnishing
1 tablespoon butter
1 ½ cups (3 sticks) butter, room temperature
1 (8 ounce) package cream cheese, room temperature
3 cups sugar
6 large eggs
1 tsp vanilla extract
3 cups sifted cake flour
1 tsp salt
1 tsp baking powder
½ tsp baking soda
Glaze
3 tablespoons butter
2 cups sifted powdered sugar
2 tablespoons milk
½ teaspoon vanilla extract
Green food coloring
Directions
Preheat the oven to 350 degrees F.
Grease a Bundt cake pan
Cake:
Cut jalapeños, clean out seeds and ribs, and finely chop. Melt 1 tablespoon butter in a medium saucepan on medium heat. Cook down jalapenos until soft, about 10 minutes. Set aside.
In a large mixing bowl, combine cake flour, salt, baking powder, and baking soda.
In a stand mixer, beat butter and cream cheese together. Add sugar and beat until light and fluffy. Add eggs, one at a time, beating well after each. Add vanilla. Add dry ingredients in three additions, scraping down the sides of the bowl after each. Mix until just combined. Pour batter into greased Bundt cake pan. Smooth out and gently tap pan on counter to remove any air pockets. Bake for 60-75 minutes or until golden and a toothpick inserted comes out clean. Cool in pan for 15 minutes. Remove cake and let cool completely.
Glaze:
Melt butter in a saucepan or microwave. Add powdered sugar a little at a time. Mix in milk and vanilla. Add a little green food coloring. Adjust thickness to your liking. If it’s too thick, add more milk. If it turns out too thin, add more powdered sugar.
Putting It All Together:
Pour glaze over cooled cake. Place jalapeños on top to make it look pretty. Cut, serve, and enjoy!
I guess there’s another thing I have in common with Dag. I love this cake! It would completely break my heart (and my teeth) if I tried to eat a giant jalapeño Bundt cake only to find out it’s made of cement. Well, I can’t say the same for my beaver brethren (Norb splattered batter on Dag’s booty in Mistaken Identity), but this cake will at least keep the two of us out of trouble. For now.
Whenever my parents would ask us kids where we’d like to go on vacation, we would always say Nowhere. And by that, we always meant Kansas. We didn’t actually want to vacation in Kansas, but creepy stuff supposedly happens there and we wanted to see it for ourselves. Our request was always shot down, but at least we could watch Courage and see the place through his eyes. Honestly, I’m a huge chicken and probably would’ve cried if I ever came face-to-face with King Ramses or Benton Tarantella. So thank you, Mom and Dad!
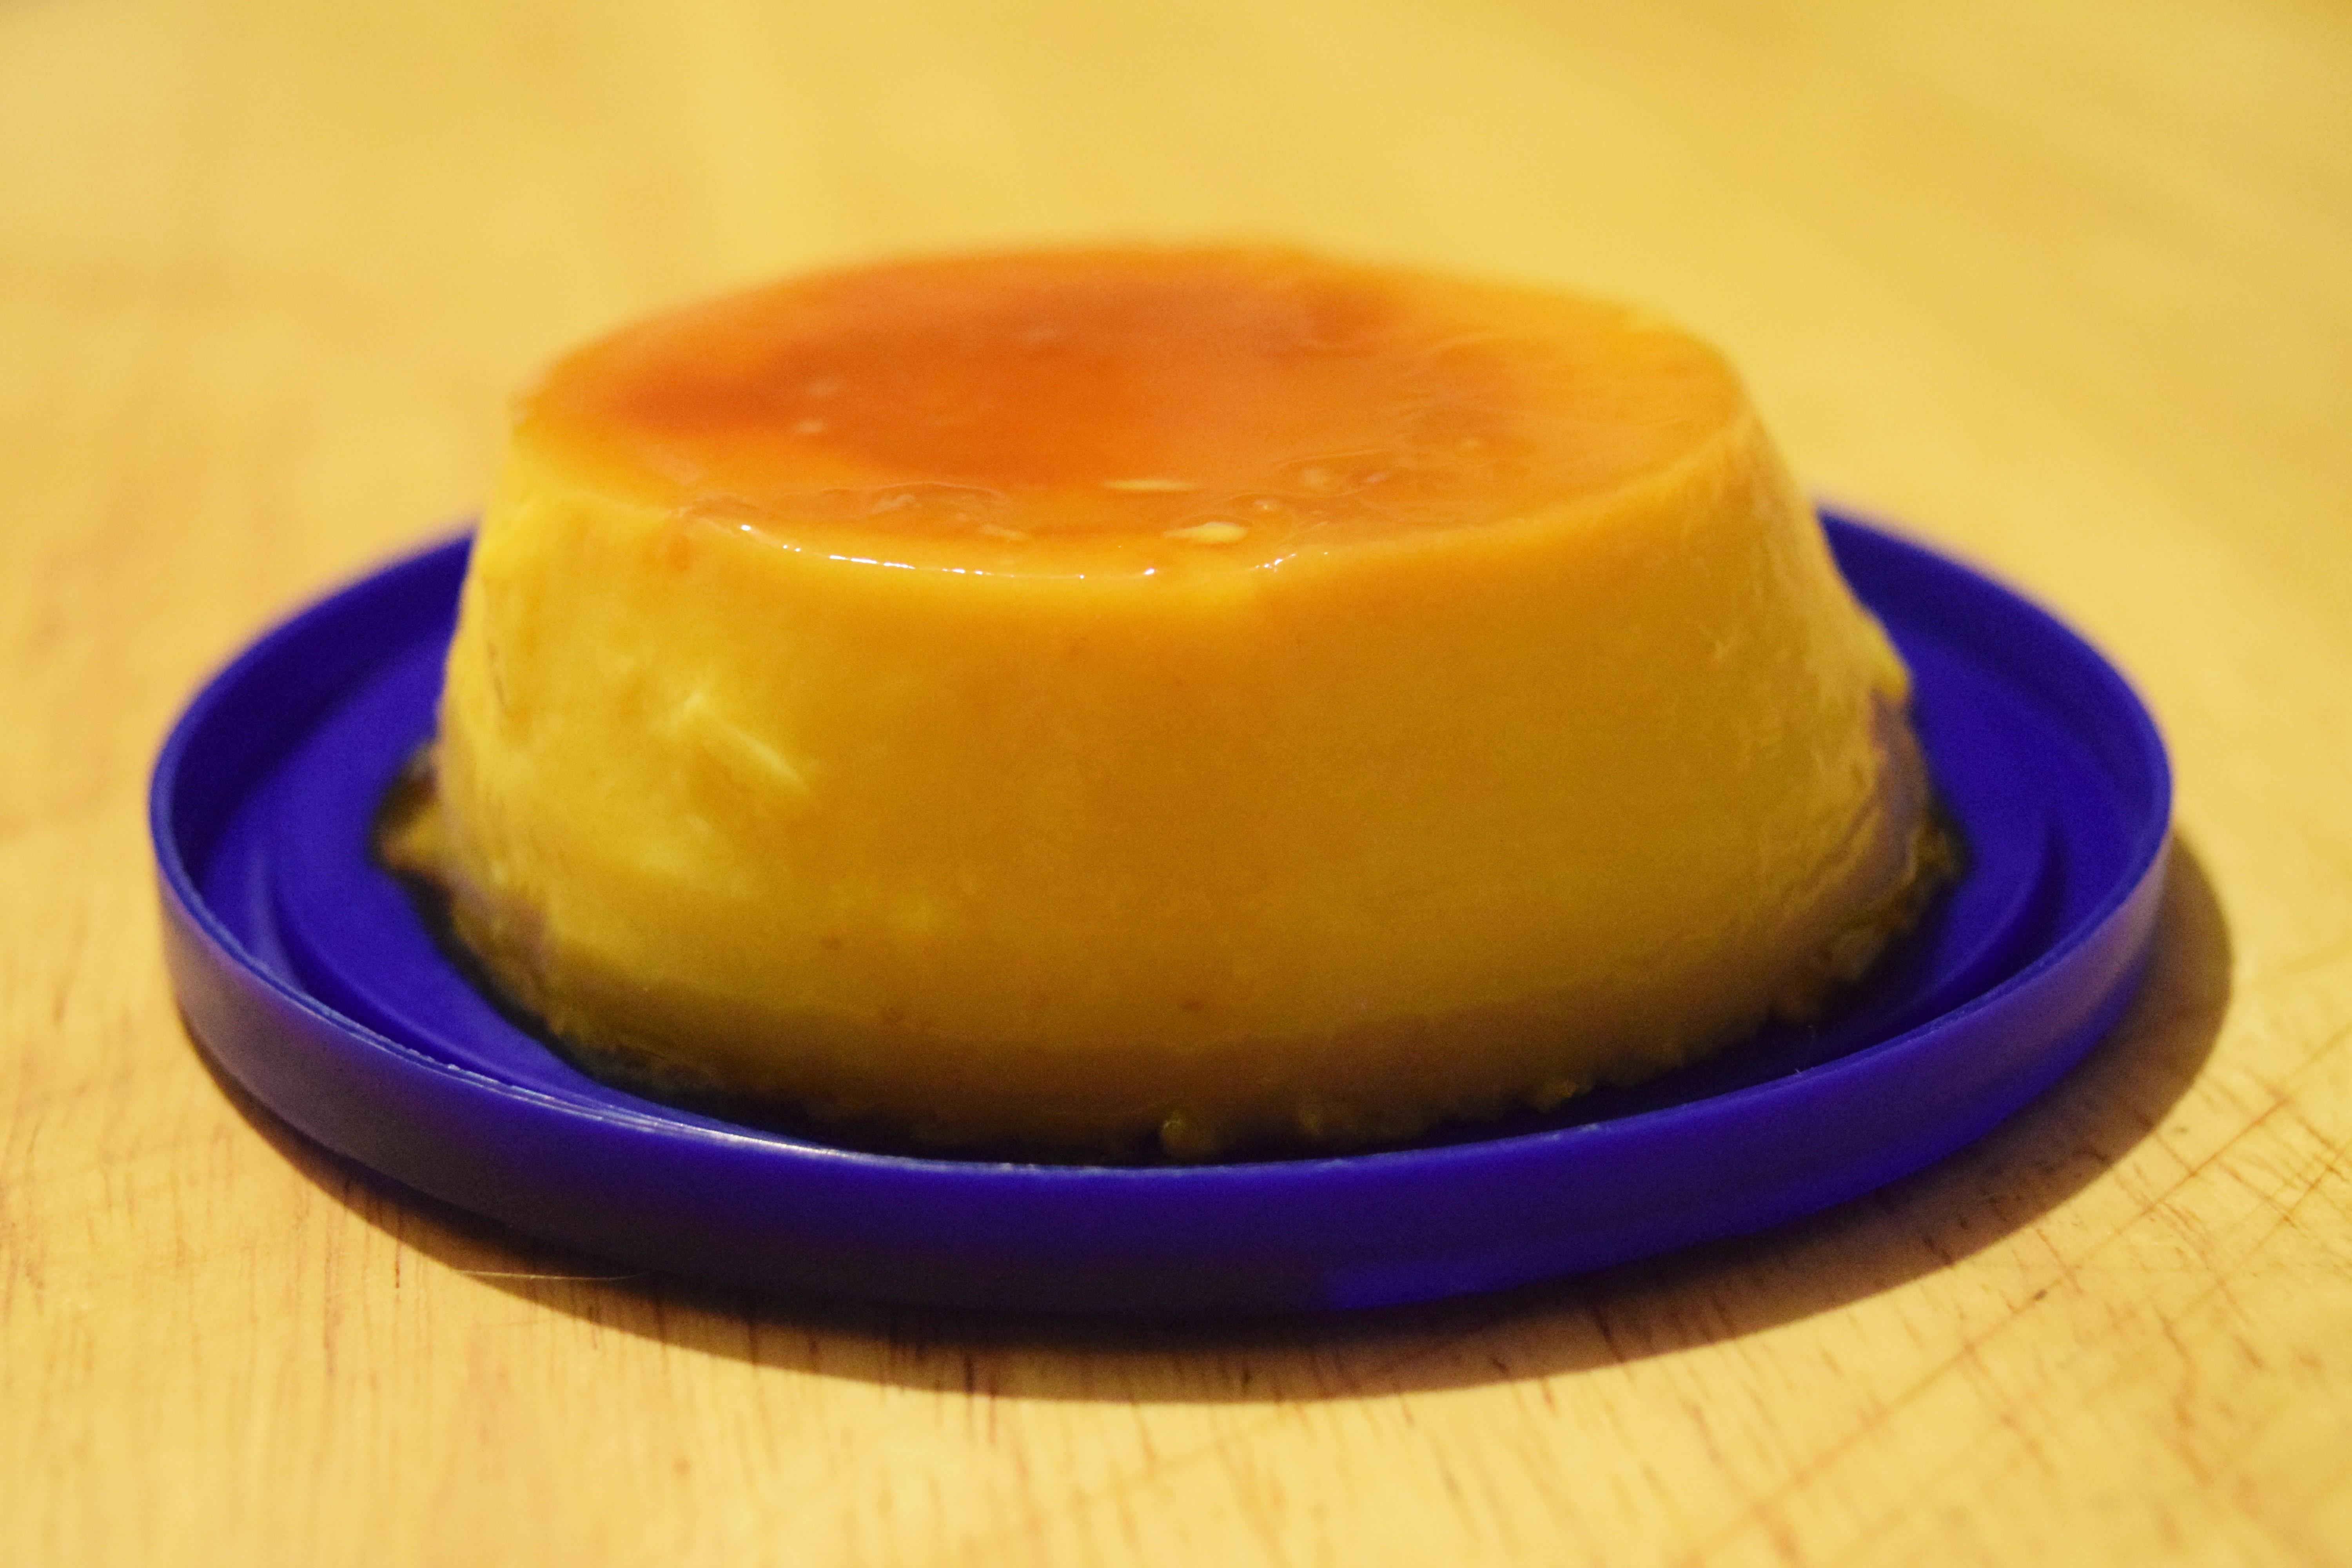
While I was safe on my couch, poor, little Courage had to deal with all kinds of horrors on his own. Be it a weremole or an abominable snowman or chickens from outer space. All for Muriel’s sake, but sometimes the scariest thing on the farm is Muriel herself. Like when she and Eustace become violent, thieving flan maniacs after being brainwashed by a Flantasy Flan commercial. The whole brainwashing bit doesn’t sound too bad for a marketing strategy, minus the whole violent, thieving part. “Buy Flantasy Flan.” Catchy. But the self-proclaimed King of Flan didn’t have to hypnotize anyone. Flan is delicious.
Recipe makes 5 flan.
Ingredients
Caramel
½ cup sugar
Custard
¾ cup sugar
3 cups milk
4 large eggs
¼ teaspoon salt
2 teaspoons vanilla
Yellow Food Coloring
Directions
Preheat the oven to 350 degrees F.
Bring a large pot of water to a boil and place 5 six-ounce ramekins in a deep baking dish or roasting pan.
Caramel
Add ½ cup of sugar to a saucepan on low heat. Without stirring the sugar, let it melt until it turns amber. Remove from heat and quickly pour caramel into each ramekin. Swirl each around to coat bottoms evenly.
Custard
Heat milk and ¼ cup of sugar in a saucepan over medium heat until mixture begins to bubble and steam, about 5 minutes. Do not let the mixture boil.
Whisk together eggs, salt, and remaining ½ cup of sugar in a large mixing bowl. Whisk a small amount (about a ladle) of milk mixture into eggs to temper them. Whisk in 2 to 3 more ladles, one at a time. Now add egg mixture back to the saucepan with the remaining milk mixture and whisk to combine. Strain custard through a sieve into a small bowl or liquid measuring cup. Add vanilla and a small amount of yellow food coloring.
Divide custard among the ramekins and add boiling water to the dish/pan until it reaches halfway up the sides of the ramekins. Bake for 45-50 minutes or until custard is set.
Remove the dish/pan from the oven and take ramekins out of the water bath. Let cool until room temperature. Chill for 4 hours. If you’re impatient, at least let them chill for 1 hour. When ready to eat, run a knife around the edge of the ramekin. Place a small plate over the ramekin and invert them. When you lift up the ramekin, the flan should be jiggly and covered in caramelly goodness. Grab a spoon and dig in!
Oops! I’d much rather make my own flan than buy the pre-made stuff. Sorry, King of Flan. You lost one customer, along with all of Nowhere. Oh, well. That’s one less problem for Courage to deal with. That is, until someone or something comes lurking around that farmhouse.